Tuesday, February 17, 2015

Practice makes perfect....

I love learning how to make a new dish or try a new technique. But, let's face it, I'm usually working such crazy hours that it can be hard to find the time (or the energy). In fact, those of you who've been reading my blog from the beginning know that one of the main reasons I started this blogging adventure was to give myself a reason and motivation to get creative cooking in my off hours. (And I'm so glad I did, this has been so much fun!)

We plan our cooking classes about two months in advance, so back in late November I was putting together the class schedule for February. Looking at what we had planned already, I realized that we didn't have a pasta making class on our calendar for this month. Pasta making is one of our most popular, we teach the students to make the dough completely from scratch. In fact, I don't even let them mix the dough in a bowl, I have them make a well of flour right there on the prep table. The pastas that we typically make are egg noodles, rolled into flat sheets, and then either made into raviolis or cut into some kind of ribbon (fettuccine, pappardelle, etc.) But, for this class, I wanted to do something different, so I added orecchiette to the menu.

Now, I'd never made orecchiette before, but after some quick research, it seemed like it was fairly straightforward and would be a fun addition to our regular pasta making class. And, it would be a new technique for me to learn. So, I added it to our calendar and sent it off to be posted to our class website. Flash forward from November to last week, and it suddenly occurred to me that this pasta class was coming up on our schedule, and I still had never made orecchiette. So, guess what I did on my next day off--taught myself how to make orecchiette!

One of the most common questions I get from my students in pasta class is about flour, specifically when to use semolina, all-purpose, or Italian 00. Semolina flour is milled from durum wheat which has a higher gluten content than the types of wheat typically used for other flours, such as all-purpose. The higher gluten content makes it ideal for extruded, shaped, or formed pastas, such as orecchiette. Italian 00 flour is a softer flour, although it's gluten content is not that much less than semolina, and in fact is on par with all-purpose. However, it is milled in such a way to have an extremely fine texture, and pastas made with 00 flour are typically more delicate. This is also why pastas made with 00 or all-purpose typically use eggs, the protein from the egg white gives the pasta additional structure and strength. I usually teach basic pasta making with all-purpose flour since that's what most of us have in our kitchens at home.

Now, back to the orecchiette. I researched recipes and found that most chefs said that orecchiette is traditionally made with just semolina flour, but every single recipe I found used a mix of semolina and all-purpose. Ratios varied from recipe to recipe, but all used both flours. The only other ingredients are salt and warm water. All required the dough to rest, some for 30 minutes, some for several hours, some at room temperature, some in the refrigerator. The following recipe is the one I put together after reading all of these resources and recommendations. 


Orecchiette Pasta

2 cups (8 ½ oz) all purpose flour
2 cups (12 ½ oz) fine semolina flour
2 teaspoons Kosher salt
1 to 1 ½ cups hot tap water

Whisk together the flour, semolina and salt in a bowl of a stand mixer. Add 1 cup of water and mix by hand until the dough forms, adding additional water a tablespoonful at a time as needed to moisten the dough. Attach the bowl to the mixer, fit the dough hook, and mix/knead the dough on low speed until smooth and stiff, about 5 minutes. Remove the dough from the bowl, form into a flat disk and wrap in plastic wrap. Chill in the refrigerator for 2 hours.

Cut the dough into 8 equal sized pieces. Working with one piece at time, roll the dough on a lightly floured surface into a “snake”, about ½ to ¾ inches in diameter. Using a sharp knife, cut the “snake” into ¼ inch thick coins.

Orecchiette means “little ears”, and these small, cup shaped pasta do indeed look like small ears. There are a couple of different ways to form the orecchiette. One way is to use what's referred to as a "nona knife"--nona is Italian for grandmother. Based on the pictures I've seen, it looks very similar to a table or butter knife. The tip of the nona knife is placed in the center of the pasta coin and pulled back while pressing the coin against the table or cutting board. The coin flattens and curls around the tip of the knife to form the little cup. 

Another technique is done with your thumb and the palm of your hand. To form the orecchiette, place a pasta coin in the palm of one hand, place the tip of your thumb on the opposite hand on the coin and press dough while twisting your thumb and palm in opposite directions. You should have a small cup shaped piece of pasta, thinner in the center and thicker around the outer edges, resembling a small ear. Alternatively, you place the dough coin on the cutting board and press/twist with your thumb.  

Ultimately, I preferred the method of pressing against the palm of my hand. I found it easier to form the cup, and the orecchiette even picked up the pattern of the lines in the palm of my hand, adding to that rustic appearance.

Transfer the orecchiette to a lightly floured sheet pan and repeat with the remaining coins. The pasta can be dried and stored at room temperature, but unless you have a dehydrator at home or live in the desert, I don't recommend this option. The dough just doesn't dry fast enough sitting out on your kitchen counter and can get "funky". Instead, place the pasta in a single layer on floured sheet pans, then put the sheet pans in the freezer. After a few hours, the pasta should be frozen hard enough that you can scoop it off the sheet pan and transfer the orecchiette to a zip top bag for long term storage in the freezer.


So, I now found myself with trays full of these adorable little pasta ears--of course, I had to make myself something yummy for dinner. A traditional dish with orecchiette uses broccoli rabe and Italian sausage. Well, I didn't have broccoli rabe in the fridge, but I did have regular broccoli, and I decided to throw in some sun dried tomatoes for a little extra something special. I used sweet Italian sausage (because that's what I had on hand), but I generally prefer spicy for a dish like this.


Orecchiette with Italian Sausage, Sun Dried Tomatoes and Broccoli 

Serves 4

1 recipe of orecchiette
1 pound broccoli, trimmed and cut into 1 inch pieces
2 tablespoons extra virgin olive oil
1 ½ pound spicy Italian sausage, casings removed
1 medium onion, diced
4 cloves garlic, roughly chopped
½ cup thinly sliced sun dried tomatoes in oil, drained
½ cup white wine
Kosher salt and black pepper
shaved parmesan cheese to garnish

Bring a large pot of salted water to a boil. Prepare a large bowl of ice water. Place the broccoli in the pot and cook until bright green and tender, about 4 to 5 minutes. Using a spider or slotted spoon, remove the broccoli from the pot and transfer to the ice water to stop the cooking. Drain. Keep the pot of salted water simmering while you make the sauce.

Heat a large skillet over medium heat.  Add the olive oil and sausage and stir, breaking up the sausage as it cooks. When the sausage is browned and no pink is visible, add the onions and cook, stirring until the onions have softened, about 5 minutes.  Add the garlic and sun dried tomatoes and cook until the garlic is fragrant, about 1 or 2 minutes. Add the wine and stir, scraping the bottom of the skillet to release any browned bits from the bottom of the pan. Season with salt and pepper, reduce heat to low.

Return the pot of salted water to the boil and add the orecchiette, stirring occasionally. As the water returns to the boil, the orecchiette will begin to float to the surface. After they have boiled for about 5 minutes, remove one from the water and taste it for doneness. The pasta will be al dente and a bit chewy when done. Continue to boil as needed to finish cooking.

Raise the heat on the skillet to medium, add the broccoli rabe. Using a slotted spoon or spider, transfer the orecchiette into the skillet and stir to mix into the sauce. Add a ladle or two of pasta water as needed to loosen the sauce. Transfer the pasta to a serving bowl and garnish with shaved parmesan. Serve.

P.S.: The class went great!

Tuesday, February 10, 2015

I hate Valentine's Day....

Okay, so hate is probably too strong a word. Let's just say, I don't do Valentine's Day. Last year, I told the guy I was seeing that I didn't celebrate Valentine's Day. At first, he smiled and looked relieved, but then he got a worried and somewhat suspicious look on his face. I had to assure him that this wasn't some sort of test or secret girl code for "Of course I celebrate, and I expect you to sweep me off my feet and shower me with gifts and affection." In spite of my assurances, I think he was secretly waiting for the other shoe to drop until February 15th.

Why don't I celebrate? Well, these days I'm usually working, and this year I'm not currently seeing anyone anyway. But, even without the work excuse or the no date excuse, I never really celebrated. It just seemed like a bunch of fluffy nonsense that had as much chance for generating disappointment as it did butterflies. I'd rather receive flowers "just because" rather than because of a date on the calendar.

Now, don't get me wrong, even though I don't celebrate the big day myself doesn't mean I can't have a little fun with it, as I hope you can appreciate with this week's recipe, Little Devils. These cupcakes are my tribute to everyone who's ever been burned by love. As we all know, Cupid may look like a cherub, but anyone who’s been stung by one of his arrows knows that he likes to have his fun, too. These mini-cupcakes are chocolate devil's food topped with Italian meringue and browned with a crème brulée torch.


Little Devils
Makes 18 full sized cupcakes, about 60 mini-cupcakes

For the cupcakes:
6 Tbsp     unsweetened Dutch-process cocoa powder
1 ½ cups  all-purpose flour
½ tsp        baking soda
½ tsp        baking powder
½ tsp        coarse salt
¾ cups     unsalted butter
1 ¼ cups  sugar
2               eggs
2 tsp         pure vanilla extract
½ cup       sour cream
½ cup       milk

For the meringue:
1 ½ cups  sugar
1 tbsp       corn syrup
½ cup       water
6               large egg whites

To make the cupcakes:

Preheat oven to 350˚F. Line mini-muffin tins with paper liners. Whisk together cocoa, flour, baking soda, baking powder, and salt.

Place the butter and sugar in the bowl of a stand mixer and beat on medium to medium high speed until pale in color and light and fluffy in texture, about 4 minutes. Add the eggs, one at a time, beating until each is incorporated, scraping down sides of bowl as needed. Add the vanilla and beat until combined. Reduce speed to low. Add half of the flour mixture and mix until just blended. Add the milk and sour cream, and mix until just blended. Add the last half of the flour and mix until blended, scraping down the sides of the bowl as needed. Be careful to not overmix the batter or you will develop too much gluten and the texture of the cupcakes will be chewy and bready.  

Using a portion scoop, spoon the batter into the lined cups, filling each 2/3 to ¾ full. It's important to make sure they are all filled with the same amount of batter to ensure that they all bake evenly. It's also important to not overfill the cupcake cups as they will "mushroom" as they bake and stick to the top of the pan.

Bake for 12 to 15 minutes or until a tester inserted in the cakes comes out clean. Let the cupcakes cool in the pan for about 10 minutes, then transfer them to a rack to finishcooling completely.

To make the meringue:

Heat sugar, water and corn syrup in a saucepan over medium high heat to the soft ball stage, 248°F on a candy thermometer. 

While the sugar is cooking, whip the egg whites to stiff peaks in a stand mixer with the whip attachment. Reduce the mixer speed to medium low and carefully pour in hot syrup. Increase the mixer speed to medium high and continue to whip until cool (about 5 minutes). Spoon or pipe the meringue on top of the cupcakes. Try different piping tips and get creative. Using a crème brulée torch, brown the meringue. You'll see that depending on which tip you used to pipe the meringue, you'll get different colors and patterns with the torch.  


The cupcakes can be stored in an airtight container in the refrigerator for several days. That is assuming you can keep yourself from devouring them all at once.  Enjoy!


Tuesday, February 3, 2015

Winner, winner, chicken dinner...

I just love Julia Child, she's my hero and my inspiration. She's also incredibly funny. In last week's blog, I gave you my recipe and thoughts on how to make a simple roast chicken. Julia Child, who mastered so many elevated and complicated French cooking techniques, when it came down to it, preferred good, fresh food prepared simply and well, like a really good roast chicken. So, for this week's blog, I thought I'd start it out by quoting the great Julia, these two in particular having to do with chicken:

"I always give my bird a generous butter massage before I put it in the oven. Why? Because I think the chicken likes it -- and, more important, I like to give it."


"The best way to execute French cooking is to get good and loaded and whack the hell out of a chicken. Bon appetit." 


(....there is apparently some debate about whether this second quote is really attributable to Julia, but I think it sounds like her, and I'm sure she would think it incredibly amusing!)

So, let's say you've taken inspiration from my blog and roasted a chicken. Or, more likely, you picked up a rotisserie chicken at the store. (No judgement! Let's face it, how often do any of us think to buy a whole fresh chicken when we're at the grocery store, much less remember to take it out of the freezer far enough in advance for it to defrost.) You've enjoyed a lovely dinner, indulged in eating all of the crispy skin, but now you've got leftovers. Or maybe you don't, maybe all you have left is the carcass. (Whatever you do, don't throw out that carcass!) The following recipes are some of my favorite ways to use leftover cooked chicken.


Dill Chicken Salad Pita Pockets
Serves 8

I developed this recipe when I was the chef at a small wine bar in Arlington, VA. We served it there on a French baguette, but I like it better with pita bread. I've made this a number of times, and most folks react with skepticism when I tell them the main herbal element is dill. I haven't had anyone turn down a second helping yet.... 

4 cups   shredded cooked chicken
½ cup    minced shallots
½ cup    fresh dill, chopped
1 cup     mayonnaise
              salt and pepper to taste
8            pita breads, sliced in half
16          leaves of Boston lettuce
           
Mix the chicken, shallots, dill and mayonnaise in a medium bowl. Season with salt and liberally with black pepper. Place the lettuce leaves in the pita pockets and fill with the chicken salad. 


Chicken Tortilla Soup 
Makes 6 to 8 servings

This isn't your mother’s chicken noodle soup recipe.Toasted spices, roasted tomatoes, smoky chipotle peppers—all of the best flavors of Mexico make this a soup that you’ll crave at any time of year. If you want a spicier soup, add a second chipotle pepper or more adobo sauce.

3             whole allspice
1             whole clove
½ tsp      cumin seeds
¼ tsp      black peppercorns
4             plum tomatoes
1             medium white onion, 
               sliced
2             garlic cloves
1             chipotle pepper in adobo, finely chopped
1 Tbsp    adobo sauce
3 quarts  low sodium chicken stock
4 cups    shredded cooked chicken
6             green onions, sliced
½ cup     chopped fresh cilantro
3 Tbsp    fresh lime juice

20           7-to 8-inch corn tortillas
3 Tbsp    olive oil
2             firm-ripe avocados, peeled, seeded and diced
               Salt and pepper

Place the allspice, clove, cumin seeds, and peppercorns in a dry small skillet (not nonstick) over medium-low heat. Shake the skillet occasionally, until the spices are fragrant and a shade darker, about 2 minutes. Transfer the spices to a spice grinder and process into a powder.

Char the tomatoes and onion slices on an open flame or under the broiler until blackened. Add the
tomatoes, onion slices, ground spices, garlic, chipotle, adobo sauce, and one cup of chicken stock to a blender. Blend until mixture is smooth. 

Add the purée and the remaining chicken stock to a stock pot and bring to a boil. Reduce the heat and simmer for about 10 minutes. Add the shredded chicken and continue to simmer 10 to 15 minutes more. Add the green onions, cilantro and lime juice to the soup. Season to taste with salt and pepper.

While the soup is simmering, preheat the oven to 350°F. Cut the tortillas into ¼ inch thick strips and toss them with the olive oil. Spread the strips into a single layer on a large baking sheet and sprinkle with salt. Bake the strips until they are crisp and golden brown, about 15 minutes.

To serve, ladle the soup into bowls and garnish with the tortilla strips and diced avocado.


Chicken and Dumplings
Serves 8


This traditional Southern chicken stew is pure comfort in a bowl. If you don't have a chicken carcass, you can substitute low sodium chicken stock and shredded cooked chicken.

For the broth: 
1   roasted chicken carcass
3   celery stalks, roughly 
     chopped
2   carrots, roughly chopped
1   medium onion, roughly 
     chopped
2   large sprigs of Italian parsley
2   sprigs of thyme
1   bay leaf
5   black peppercorns

For the stew:
¼ cup  unsalted butter
1          large onion, finely diced
3          carrots, peeled and sliced
3          ribs of celery, sliced
2          cloves garlic, chopped
¼ cup  all purpose flour
1 tsp    chopped fresh thyme leaves
1 Tbsp chopped fresh parsley
8 oz     button mushrooms, sliced
            Kosher salt and pepper to taste

For the dumplings:
1 ¼ cups all purpose flour, plus more for dusting
1 ½ tsp    baking powder
1/8  tsp     baking soda
½  tsp      salt
2 Tbsp     chilled unsalted butter, cut into ½ -inch cubes
2 Tbsp     shortening
2 Tbsp     chopped fresh herbs, such as parsley, thyme, chives
2/3 cup     chilled buttermilk

Place the chicken carcass, celery, carrots, parsley, thyme, bay leaf and peppercorns in a large saucepan or stock pot. Add enough water to cover the carcass and vegetables. Heat over medium high heat to the boil, then reduce the heat to a simmer and cook for 45 minutes to an hour. Using a spoon or ladle, skim any gray foam or excess fat off the surface as it forms. 

Remove the heat and strain the broth into a large bowl, retaining the chicken carcass.  Measure out 6 cups of the broth. When the carcass has cooled enough to handle, pick the meat off the bones and place in a second bowl. Discard the picked carcass and other solids strained from the broth.

Melt the butter in a large Dutch oven over medium heat. When the butter is completely melted and the bubbling and foaming has stopped, add the onion, carrots, and celery.  Season with salt and pepper. Cook, stirring, until the vegetables are softened and translucent, about 5 minutes. Add the garlic and stir until fragrant, about 1 minute. Add the flour and stir to completely mix the flour into the vegetables. Add the reserved chicken broth and stir to completely dissolve the flour. Bring the mixture to a boil, then reduce the heat to a simmer. Add the herbs, the reserved picked chicken and the mushrooms and simmer for another 10 to 15 minutes. Season to taste with salt and pepper.

While the stew is simmering, combine the flour, baking powder, baking soda, and salt in a large bowl; whisk until well blended. Cut in butter and shortening until coarse meal forms. Mix in herbs. Stir in the buttermilk until well combined (the dough may be wet).

Drop the dough in large spoonfuls over the top of the stew and cover the pot with a lid. Cook until the dumplings are puffed and cooked through, about another 15 minutes. Serve.

Tuesday, January 27, 2015

So, they said it would be a blizzard....

If you've been watching the news the last few days, you'll know that the northeastern United States was supposed to get hit with a colossal blizzard. The blizzard of the century. The worst winter storm on record.  Cities and counties shut down the schools, New Jersey even banned all motor vehicle traffic. Grocery store shelves were emptied. Airline flights were canceled from DC to Philly to NYC to Boston in anticipation of the storm. Snow predictions in Philadelphia ranged from 10 inches to over 24. Chicken Little would be proud, everyone was preparing for the sky to fall. 

When all was said and done, we got about 2 or 3 inches of snow in my neighborhood.  I think the official snowfall total at the Philly airport was about an inch and a half.  Boston, coastal Massachusetts, and Maine are getting hammered, and to my friends and work colleagues up there, please stay safe and warm. But, Chicken Little is laughing his head off at the weather forecasters right now.

So, Chicken Little, here's my next recipe, inspired by the blizzard that wasn't. 


Roast Chicken

1     4 to 5 lb whole chicken
3     carrots, cut into 2 inch pieces
3     celery stalks, cut into 2 inch pieces
1     small onion, cut into 4 pieces
1     small lemon, cut into 4 pieces
6     large sprigs of thyme
       extra virgin olive oil
       Kosher salt and black pepper


Preheat the oven to 425°F and place a rack in the lower half of the oven.

Remove the chicken from its wrappings and remove the giblets and neck from the body cavity (if present). Pat the chicken dry with paper towels, being sure to absorb any juices inside the body cavity. I know many of you like to rinse your chicken under running water, but I don't recommend this. I have this conversation with my students all the time, they think they're "cleaning" the chicken and washing away the salmonella. The only thing that will take care of the salmonella risk it to cook the chicken to a minimum of 165°F. What's really happening when chicken is rinsed under running water is that the chicken juices are mixing with the water and splattering all over. They even form an aerosol vapor that can land on every surface in your kitchen. I'll understand if you choose to step away from reading right now to go bleach your kitchen countertops.

Scatter the carrot and celery pieces across the bottom of a small roasting pan, skillet or baking dish. Place the chicken on top of the vegetables. Not only will the vegetables help to flavor the chicken, lifting the chicken off the bottom of the pan will keep it from sticking to the pan and allow the oven's heat to circulate under the chicken. Sprinkle salt and pepper inside the body cavity, then insert the onion and lemon pieces and thyme into the cavity. Sprinkle the chicken with more salt and pepper. Rub the exterior of the chicken with olive oil.  This will help to achieve a beautifully brown and crispy skin.

Using kitchen twine, tie the legs together. I prefer to tie one end of the string around one ankle, then wrap it around the other ankle and pull the two legs together. I'll then loop the string around the tail and back around the ankles. For the wings, I fold the wing tips back and tuck them under the shoulders of the chicken. This will give the chicken a more uniform and compact shape, allowing it to roast more evenly.

Place the roasting pan in the oven and roast for 15 minutes. Drop the temperature to 350°F and continue to roast until a thermometer inserted in the thigh reads 165°F. It should take about 15 minutes per pound.

Remove the chicken from the oven and allow it to rest for 15 minutes before carving and serving. Resting allows the temperature of the chicken to equalize, you may even pick up an additional 5 to 10 degrees of internal temperature while it rests. Resting also allows the juices to reabsorb into the meat, resulting in juicy slices of roast chicken instead of a puddle on your carving board.

In my next blog posting, I'll share some recipes you can make with leftover cooked chicken, even the carcass. 

Enjoy!

Tuesday, January 20, 2015

A few of my favorite things....

I left Texas over 12 years ago when I moved to Washington, DC, for a work assignment. Except for a couple of years as a baby, I had lived in the Houston area my entire life. I knew that living in DC would be different than living in Houston, I was prepared for the big culture shock, and in fact loved the change. What surprised me, though, was the absence of the little things that I had always taken for granted growing up in southeast Texas. For the first time, I came to truly appreciate the regional cuisine, food, and ingredients of my home state.

Growing up, I never understood why so many recipes called for the use of walnuts. Pecans were so plentiful, but so rarely called for in recipes. Of course, I now understand why. Pecan trees were everywhere in Houston, folks even used them as landscape trees in their yards. I lived in the outer suburbs of Houston, much of the area round our subdivision was still used for agricultural purposes, and there was even a pecan orchard. I remember my mom going to the roadside farm stand at the orchard and bringing home bushel bags of pecans. We'd then sit around the kitchen table, cracking the shells and removing the nut meats. Even now as I sit here typing this, I can smell the fresh pecans and feel the shell shards in my hands. We always had bags of pecans in the freezer. They are still my favorite nut for baking and desserts.


Speaking of roadside farm stands, you knew it was winter in southeast Texas when the citrus stands started popping up. The Rio Grande Valley in the southernmost part of Texas along the border with Mexico is prime citrus farm country. Oranges, lemons, limes--but the star of the show was the Texas Ruby Red grapefruit. The skin is a delicate orangish-pink, the flesh a deep pink, and the flavor was heavenly. Grapefruit is so often sour, but not the Texas Ruby Red. They are so sweet that you can peel them and eat them like an orange. Most of the grapefruit available at the markets here in the northeast comes from Florida, and you can find pink grapefruit, but it's just not the same as the Texas Ruby Red.

So, this week's recipe is inspired by these two of my favorite things from Texas, the pecan and the grapefruit:  Pecan Crusted Chicken with Grapefruit Beurre Blanc and Sautéed Winter Greens.  

One of the challenges with cooking chicken breast is that the meat is thick at one end and tapers. The thinner section is almost always over cooked to ensure that the thicker section is cooked through. I recommend cutting the chicken into medallions, simply slice at an angle across the breast and then use a meat mallet to gently pound and flatten the pieces to an even thickness. (If you place the chicken pieces inside a large zip-top bag, you minimize the chances of splattering chicken juices and other bits all over your kitchen.) Not only will the chicken cook more evenly, it will cook more quickly, and it takes most of the guesswork out of the cooking process--when the chicken is golden brown on both sides, it is done.

The sauce is a variation on the classic French sauce, Beurre Blanc. Beurre blanc literally translates to white butter. It is a reduction of white wine and white wine vinegar emulsified with butter and is traditionally served with fish.  In this version, I substitute fresh squeezed grapefruit juice for the vinegar. Please note, it is important to that the butter is cold when you whisk it into the sauce. The butter must melt slowly into the sauce. If it melts too quickly, the butterfat will separate from the milk solids, resulting in an oily, broken sauce. By keeping the butter cold (and the saucepan burner on low), the butter will melt slowly and not separate, resulting in a silky, creamy, luscious sauce.

I serve this dish with sauteed winter greens, usually kale or Swiss chard. The slight bitterness of the greens is a nice counterpoint to the tangy sweetness of the sauce. The recipe is written assuming you're buying traditional mature kale or chard--the center ribs of the leaves can be tough and will take longer to cook than the leaves. However this time, I used a box of baby kale--so much easier and faster! Just add the leaves to the pan after sauteing the shallots and proceed as the recipe instructs.


Pecan Crusted Chicken with Grapefruit Beurre Blanc and Sautéed Winter Greens
Serves 4 - 6

For the sauce:
1 cup   white wine
1 cup   chicken stock
2          shallots, diced
1          sprig fresh thyme
1          bay leaf
5          whole black peppercorns
½ cup  grapefruit juice
8 Tbsp cold butter, cut into small pieces
            Kosher salt and pepper to taste

For the chicken:
2 cups  pecans
1 cup   panko bread crumbs
1 cup   all purpose flour
4          boneless, skinless chicken breasts
2          eggs, beaten
vegetable oil
            Kosher salt and pepper to taste

For the winter greens:
2 lb      Swiss chard, kale or a mixture
2 Tbsp olive oil
1          small shallot, finely diced
1          clove garlic, minced
2 Tbsp chicken stock or water
            Kosher salt and pepper

Chopped parsley and grapefruit segments to garnish

For the sauce:  Add the wine, stock, shallots, thyme, bay leaf and peppercorns to a saucepan and bring to a boil. Reduce to a simmer and reduce until thickened and syrup-like. Add the grapefruit juice and continue to cook and reduce until again thickened and syrup-like, about ¼ to ½ cup of liquid. Strain the sauce and discard the shallots, thyme, bay leaf, and peppercorns. Return the sauce to the saucepan over low heat.  Add the butter in small pieces, whisking to incorporate. Season with salt and pepper. Cover the pan with a lid and turn off the heat while preparing the chicken. 

For the chicken:  Pulse the pecans in a food processor or chop with a knife until finely chopped. Mix the pecans with the panko and transfer to a plate. Place the flour on a second plate. Place the eggs in a shallow dish, such as a pie dish. 

Slice each of the chicken breasts into about 4 or 5 medallions. Place the medallions between two sheets of plastic or inside a ziplock bag and gently pound with a meat mallet to an even thickness. Sprinkle the chicken medallions with salt and pepper.

Dip both sides of each medallion into the flour to coat and shake off the excess, then dip each medallion into the beaten egg to coat. Place the fillet onto the pecan/panko mixture and press to coat each side. Transfer the filet to parchment or waxed paper-lined baking sheet. Repeat with the remaining medallions.

Fill a heavy, large skillet to a depth of about ¼ inch with the oil and heat over medium-high heat. When the oil is hot, place the medallions into skillet and cook until each side is golden and crisp, about 2 to 3 minutes per side. (Do not overcrowd the pan; cook in batches if necessary). Transfer to wire rack set over a sheet pan and keep warm in a 200°F oven.

For the winter greens:  Cut the stems and center ribs away from the chard/kale leaves. Thinly slice the stems and center ribs and set aside. Coarsely chop the leaves and set aside. Heat a large sauté pan over medium high heat. Add the oil and sauté the shallot and sliced stems until the shallot is translucent. Add the chopped leaves and sauté until beginning to soften and wilt. Add the garlic and continue to sauté until fragrant. Season with salt and pepper. Add the chicken stock or water and cover the pan with a lid.  Allow the chard to cook until tender, about 5 minutes. Remove the lid and allow the liquid in the pan to cook away. Remove from the heat, season with salt and pepper.

To finish:  Whisk the sauce over low heat to rewarm as necessary (do not boil). Place the sautéed winter greens on each plate and top with two to three pieces of the chicken. Spoon some of the sauce over the chicken and top with grapefruit segments. Sprinkle with chopped parsley and serve.

Tuesday, January 13, 2015

I am a southern gal, after all...

I admit it, I'm a sucker for a buttermilk biscuit, especially just out of the oven. That first buttery, flaky, tender bite....I can't even describe how wonderful it is. I'm always happy to have an excuse to make biscuits, whether to serve for breakfast or to accompany a bowl of soup. In this case, it's to pair with a bowl of chili.  


We're conducting our annual physical inventory this week--we're quite literally going to count every single item in the store. It's usually an 8 to 10 hour job, wrapping up sometime after 2am. We usually bring in food, sort of a pot luck, and when Harri said she was bringing in a pot of chili, I had the perfect excuse to bake biscuits.

Biscuits are a member of the quick bread family, which also includes scones and muffins. Even if you don’t like to bake, or are scared of baking, there’s almost nothing easier to make than a quick bread. Quick breads are baked goods which rely on chemical leaveners (baking powder and baking soda) instead of yeast to give lift and rise. Yeast is a living organism, and doughs that rely on yeast can take hours to rise. The yeast consumes small amounts of the sugar and proteins in the dough and produce gas as a byproduct which causes the dough to rise. Chemical leaveners react almost instantaneously to a combination of liquid, acid, and heat to create carbon dioxide bubbles which give rise to the dough. To see a quick example, put a pinch of baking soda in a small dish of white vinegar. Just be ready with the paper towels to wipe up the vinegar foam!

Biscuits are also similar to pie crust in that, when made well, they have a tender, flaky texture. Unlike cookies or cakes when you want softened fat to cream into the dough, it is important to keep your fat cold so that it can be cut into the flour. It's the separation of the flour by the fat that results in the flaky layers we love. The choice of fat also affects the flavor and texture of the biscuit, and I use an even mix of butter and vegetable shortening. The butter gives the biscuits a great flavor and lovely golden brown color, and the vegetable shortening enhances the flakiness and tenderness.  

The only other bit of advice I'll offer when making biscuits is to be respectful of the gluten. Gluten is the protein in flour that gives doughs their structure. If you've ever seen a concrete sidewalk being poured, think of the metal rebar that is laid down first as the gluten--it's a reinforcing inner framework. But, instead of stiff, straight rods, gluten looks more like tightly coiled and tangled springs. The very action of mixing or kneading a dough can cause those springs to tighten and tangle more, resulting in a tough, chewy dough. So, don't overwork the dough, mix it just enough to get it to come together. Another way to minimize gluten development is to add acid to the dough.  This is why so many biscuit recipes rely on buttermilk, it not only makes for a tasty biscuit, it helps to keep them tender, too.

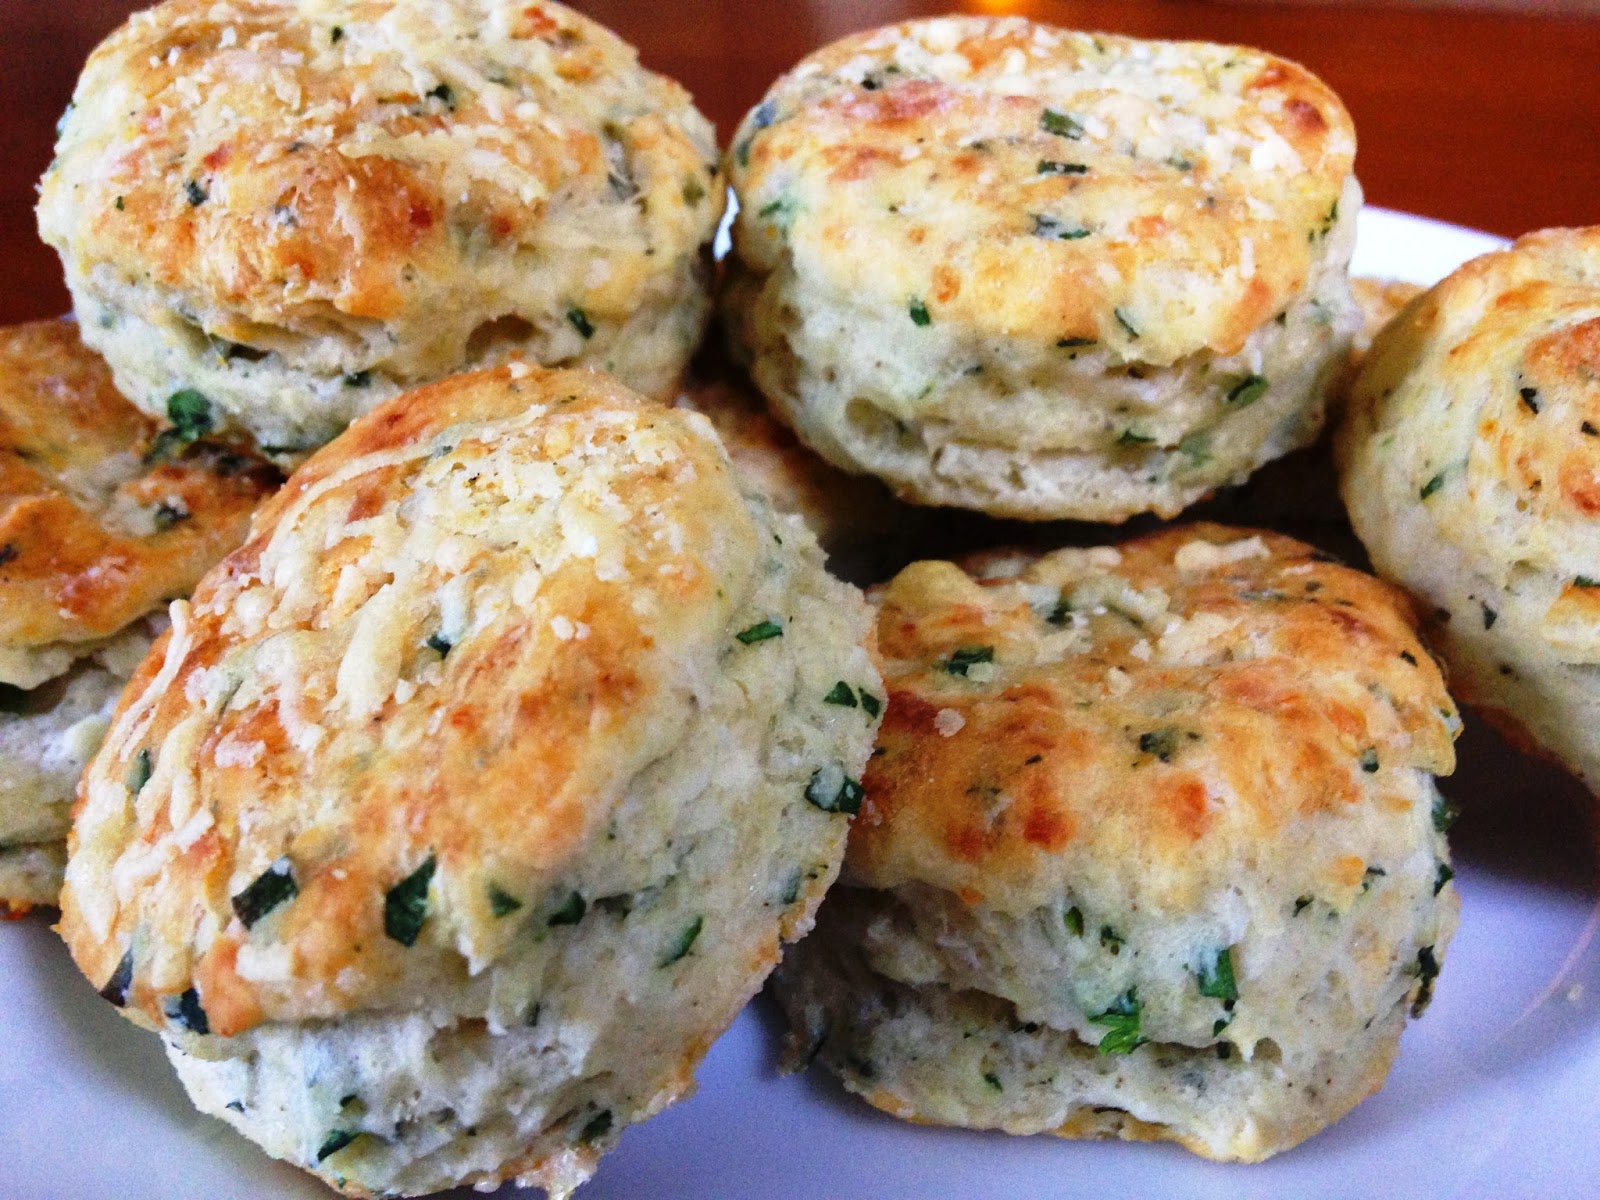
Over the years, I've tweaked my basic buttermilk biscuit recipe to the version I've included here. I've also come up with a few variations on the original, and I'm giving you two of them here, Parmesan Herb and Sweet Potato. The Parmesan Herb biscuits make great nibblies with a glass of wine...


Buttermilk Biscuits
Makes 12, 2-inch biscuits

2 cups   all purpose flour, plus more for dusting
2 tsp      baking powder
¼ tsp     baking soda
¾ tsp     salt
4 Tbsp   chilled unsalted butter, cut into ½ inch cubes
4 Tbsp   shortening
1 cup     chilled buttermilk

Preheat the oven to 425°F. Combine the flour, baking powder, baking soda, and salt in a large bowl; whisk until well blended. Using a pastry blender or a fork, cut in the shortening and butter until the mixture looks like coarse sand and the largest pieces of butter and shortening are smaller than peas. Stir in the buttermilk until well combined (the dough may be wet). Gather the dough into a ball. Press out on a lightly floured work surface (use more flour as necessary if dough is very sticky/wet) to about 1 inch thick. Using the desired cutter, cut out the biscuits. Gather the dough remnants together and flatten back into a 1 inch thick round, and cut again. Repeat until all the dough is used. Arrange the biscuits on baking sheet lined with parchment paper. Bake until the biscuits are puffed and light golden and a tester inserted into centers comes out clean, about 12 to 14 minutes. Transfer the biscuits to towel-lined basket and serve warm.


Parmesan Herb Buttermilk Biscuits
Makes about 12, 2-inch biscuits or 24, 1-inch biscuits

2 cups   all purpose flour, plus more for dusting
¾ cup    grated Parmesan cheese, divided
2 tsp      baking powder
¼ tsp     baking soda
¾ tsp     salt
¼ tsp     ground black pepper
4 Tbsp   chilled unsalted butter, cut into ½ inch cubes
4 Tbsp   shortening
¼ cup    chopped fresh herbs, such as parsley, thyme, chives, basil
1 cup     chilled buttermilk

Preheat oven to 425°F. Combine the flour, ½ cup cheese, baking powder, baking soda, salt, and pepper in large bowl; whisk until well blended. Using a pastry blender or a fork, cut in the shortening and butter until the mixture looks like coarse sand and the largest pieces of butter and shortening are smaller than peas. Mix in the herbs. Stir in the buttermilk until well combined (the dough may be wet). Gather the dough into a ball. Press out on a lightly floured work surface (use more flour as necessary if dough is very sticky/wet) to about 1 inch thick. Using the desired cutter, cut out the biscuits. Gather the dough remnants together and flatten back into a 1 inch thick round, and cut again. Repeat until all the dough is used. Arrange the biscuits on a baking sheet lined with parchment paper. Sprinkle with the remaining ¼ cup cheese. Bake until the biscuits are puffed and light golden and tester inserted into centers comes out clean, about 10 to 15 minutes (depending on size of biscuit). Transfer the biscuits to a towel-lined basket and serve warm.


Sweet Potato Biscuits
Makes 12, 2-inch biscuits

2 ½ cups all purpose flour, plus additional for kneading
1 tsp        salt
2 ½ tsp    baking powder
¼ tsp       baking soda
½ tsp       dried thyme
½ tsp       dried sage
3 Tbsp     shortening
3 Tbsp     unsalted butter, cold and cut into ½ inch pieces
1 cup       buttermilk
1 cup       cooked and mashed sweet potatoes


Preheat the oven to 425°F. Combine the flour, baking powder, baking soda, and salt in a large bowl; whisk until well blended. Using a pastry blender or a fork, cut in the shortening and butter until the mixture looks like coarse sand and the largest pieces of butter and shortening are smaller than peas. Stir in the buttermilk and sweet potato until well combined (the dough may be wet). Gather the dough into a ball. Press out on a lightly floured work surface (use more flour as necessary if dough is very sticky/wet) to about 1 inch thick. Using the desired cutter, cut out the biscuits. Gather the dough remnants together and flatten back into a 1 inch thick round, and cut again. Repeat until all the dough is used.  Arrange the biscuits on a baking sheet lined with parchment paper. Turn the dough out onto a heavily floured surface. Knead in enough additional flour so that the dough can be more easily handled.  Press the dough out into a large flat round, ½ inch thick.  Cut with a biscuit cutter and place the biscuits on a parchment lined baking sheet. Bake until the biscuits are puffed and light golden and a tester inserted into centers comes out clean, about 12 to 14 minutes. Transfer the biscuits to towel-lined basket and serve warm.