Thursday, November 26, 2015

Mmmm....gravy....

It's the beginning of the holiday season, and while most of my friends and neighbors are eating turkey today, I'm abstaining. I've already taught so many Thanksgiving themed classes in the last few weeks, that I'm all turkeyed out. Instead, I'm treating myself to a lazy morning and one of my favorite breakfasts.

Growing up, we usually just had cereal for breakfast. It was fast, easy, we kids could get it ourselves as we got ourselves dressed and out the door to school in the morning. But during the holidays when we were off of school, my mom would often make breakfast for the family. One of our favorites was biscuits and gravy. Even now as adults, on the rare occasion when all of us are together for the holidays, at least one of our breakfasts together is biscuits and gravy.

Mom's recipe uses skim milk as the the base and cornstarch to thicken. (I make mine with a flour and butter roux and whole milk--much more indulgent but oh, so tasty.) Growing up, the gravy might have sausage mixed in or it might have hard boiled eggs. Yes, hard boiled eggs. I remember one time mentioning the eggs to a friend in culinary school, and you would have thought I'd grown a second head by her reaction. Trust me, it's delicious. The best version had both sausage and hard boiled eggs. 

This breakfast is the ultimate in comfort food. I hope you enjoy!


Sausage and Egg Gravy and Biscuits
Serves 6

For the gravy:
1 pound pork breakfast sausage
4 tablespoons unsalted butter
5 tablespoons all purpose flour
4 cups whole milk
6 hard boiled eggs, peeled and coarsely chopped
Kosher salt and black pepper


Place the sausage in a large saucepan over medium heat. Cook, stirring and breaking up the sausage, until it is evenly browned and no longer pink. Using a slotted spoon, transfer the sausage to a paper towel lined plate.

Add the butter and flour to the saucepan. Using a whisk, stir and mix until the butter is completely melted and the flour is fully incorporated. When the mixture is rapidly bubbling, slowly pour in the milk, whisking to incorporate. When all the milk is incorporated, continue to cook over medium heat, stirring frequently, until the gravy thickens and just comes to the boil. Add the reserved sausage and chopped hard boiled eggs. Season to taste with salt and pepper. (This gravy LOVES black pepper, use a lot for best results.) Serve over split biscuits. 


Buttermilk Biscuits
Makes 12, 2-inch biscuits

2 cups all purpose flour, plus more for dusting
2 teaspoons baking powder
¼ teaspoon baking soda
¾ teaspoon salt
4 tablespoons chilled unsalted butter, cut into ½ inch cubes
4 tablespoons shortening
1 cup buttermilk


Preheat the oven to 425°F. Combine the flour, baking powder, baking soda, and salt in a large bowl; whisk until well blended. Using a pastry blender or a fork, cut in the shortening and butter until the mixture looks like coarse sand and the largest pieces of butter and shortening are smaller than peas. Stir in the buttermilk until well combined (the dough may be wet). Gather the dough into a ball. Press out on a lightly floured work surface (use more flour as necessary if dough is very sticky/wet) to about 1 inch thick. Using the desired cutter, cut out the biscuits. Gather the dough remnants together and flatten back into a 1 inch thick round, and cut again. Repeat until all the dough is used. Arrange the biscuits on baking sheet lined with parchment paper. Bake until the biscuits are puffed and light golden and a tester inserted into centers comes out clean, about 12 to 14 minutes. Transfer the biscuits to towel-lined basket and serve warm.


Tuesday, November 17, 2015

Gobble, gobble, gobble...

(To the melody of Deck the Halls....)

'Tis the season to eat turkey. Gobble gobble gobble, gobble gobble. 

As you might imagine, at this time of year, the focus of our classes turns to all-things-holiday. I've already taught two Thanksgiving themed classes, and there are several more to go in the next 10 days. By the time we get to Thanksgiving Day, we'll have roasted 5 turkeys, mashed 50+pounds of potatoes, and made 50+ pies in the various classes we have on our calendar.

I get asked a lot by my students about what I'm planning to cook for Thanksgiving dinner. Many of them expect that I've got an elaborate, multi-course meal in the works, complete with heritage turkeys, exotic spices, and high-end pastries for dessert. I shock them when I tell them that I'm not cooking at all. By the time Thanksgiving Day arrives, I'm all turkeyed out. 

But, those questions from my students got me to thinking....if I was going to make Thanksgiving dinner this year, what would I cook? My family is in Texas, and given that I work in retail, traveling and taking vacation during the holiday season just isn't going to happen. So, roasting a whole turkey for just me and maybe a couple of friends is just too much food. I decided on a turkey breast instead.

Now, I'll be honest, I usually prefer the dark meat of the turkey. It has so much more flavor and is so much moister than the white meat of the breast. But, there are things you can do to make the breast just as flavorful and moist. Probably the most important thing is to not overcook the meat. Get a good meat thermometer and roast your turkey to no more than 165°F. By roasting just the breast, it's actually easier to manage the temperature. When roasting a whole bird, you have to roast until the interior thigh meat is at proper temperature, which usually means the rest of the bird is over done.

The other way to add flavor and moisture is to brine the turkey breast. The simplest brine solution is just salt and water, and it works through the process of osmosis. If you remember from high school biology, osmosis is the process where cells try to attain chemical/molecular equilibrium with their surroundings. The fluids found in the turkey cells have less salt in them than the brine solution, so the turkey cells will draw in the salt to achieve that equilibrium. 

The great thing about the process is that the cells will draw in other things beside the salt. So, a good brine solution will have sugar and spices dissolved into it as well as the salt. But, why sugar? Sugar is the secret to keeping the meat moist. Sugar is hygroscopic, which means it absorbs water. Because the turkey meat will pull in some of the sugar from the brine solution, the meat will actually stay moist during cooking because the sugar will help it hold on to the juices.

(Who knew there was so much science going on with your Thanksgiving dinner?)

The next question is, to stuff or not to stuff? Growing up, my mom always stuffed our turkeys with a bread based stuffing. Man, it was good--the stuffing absorbed all of the juices from the turkey, it was so flavorful and moist. Of course, I never remember her checking the internal temperature of the stuffing to make sure it was 165°F. (As I recall, she would just put the turkey in the oven and let it cook for hours and hours.) But, that's the rule--in order to avoid salmonella, the you need to measure the temperature of the stuffing at the very core of the bird to make sure it's reached temperature. But, I was roasting just a turkey breast, so the question of stuffing really wasn't on the table. Or was it?

I hope you enjoy the following recipe. I also made a simple turkey gravy and mashed potatoes, and you'll find those recipes included as well. Whether you're going traditional this year, or ordering Chinese (which is my current plan), I hope you have a great Thanksgiving Day!


Roasted Turkey Breast Stuffed with Apricots and Almonds, Creamy Mashed Potatoes, and Brandied Turkey Gravy

The brine solution will also work for a whole turkey, but you'll need to at least double if not triple the recipe. When brining a whole turkey, you probably won't have enough room in your refrigerator or even a large enough bowl to hold the turkey and brine. I recommend using a brining bag and a cooler. Place the turkey and the brine in the brining bag (a large plastic bag), press out the air and seal it closed. Place the bag in a cooler and pack with ice.

Serves 6

For the Turkey Brine:

2 quarts cool water
1/cup Kosher salt
¼ cup brown sugar
¼ teaspoon black peppercorns
¼ teaspoon whole coriander seeds
¼ teaspoon whole cumin seeds
1 bay leaf
1 lemon, sliced

5 to 6 pound bone-in turkey breast

For the Apricot Almond Stuffing:

1 cup dried apricots
1 cup hot tap water
1 cup toasted almonds
1 cup panko bread crumbs
2 tablespoons whole grain Dijon mustard
½ bunch parsley
1 teaspoon salt
¼ teaspoon ground black pepper
2 tablespoons extra virgin olive oil

Place the water, salt and brown sugar in a bowl large enough to hold the brine and the turkey breast. Whisk until the salt and brown sugar are completely dissolved in the water. Add the spices, bay leaf, and lemon slices.

Remove the turkey breast from it's packaging and discard the "gravy" packet if present. Rinse the turkey under cool tap water, and pat it dry with paper towels.


Using a sharp knife, carefully remove the turkey meat from the carcass. You should be able to see where the edge of the breast meat meets the rib cage, using the tip of the knife, "shave" the meat off of the rib cage. Save the carcass for making turkey stock.


Place the turkey meat into the bowl of brine solution, cover and refrigerate. Allow the turkey to sit in the brine solution for 12 to 48 hours.


Place the apricots in a small bowl and cover with the hot tap water. Allow the apricots to soak for 15 to 20 minutes. Place the apricots and their soaking water to the bowl of a food processor. Add the remaining ingredients for the apricot almond stuffing and process until a coarse paste is formed.


Preheat the oven to 450°F.

Remove the turkey from the brine solution and pat dry with paper towels. Carefully remove the skin from the turkey breast. Save the skin.


Place the skin side of each half of the breast down onto the cutting board. Using a sharp knife, carefully slice through the breast, keeping your knife parallel to the cutting board, and open up the breast like a book. Cover each breast with a sheet of plastic wrap and using a meat mallet, gently pound the turkey to flatten the breasts and even out their thickness.


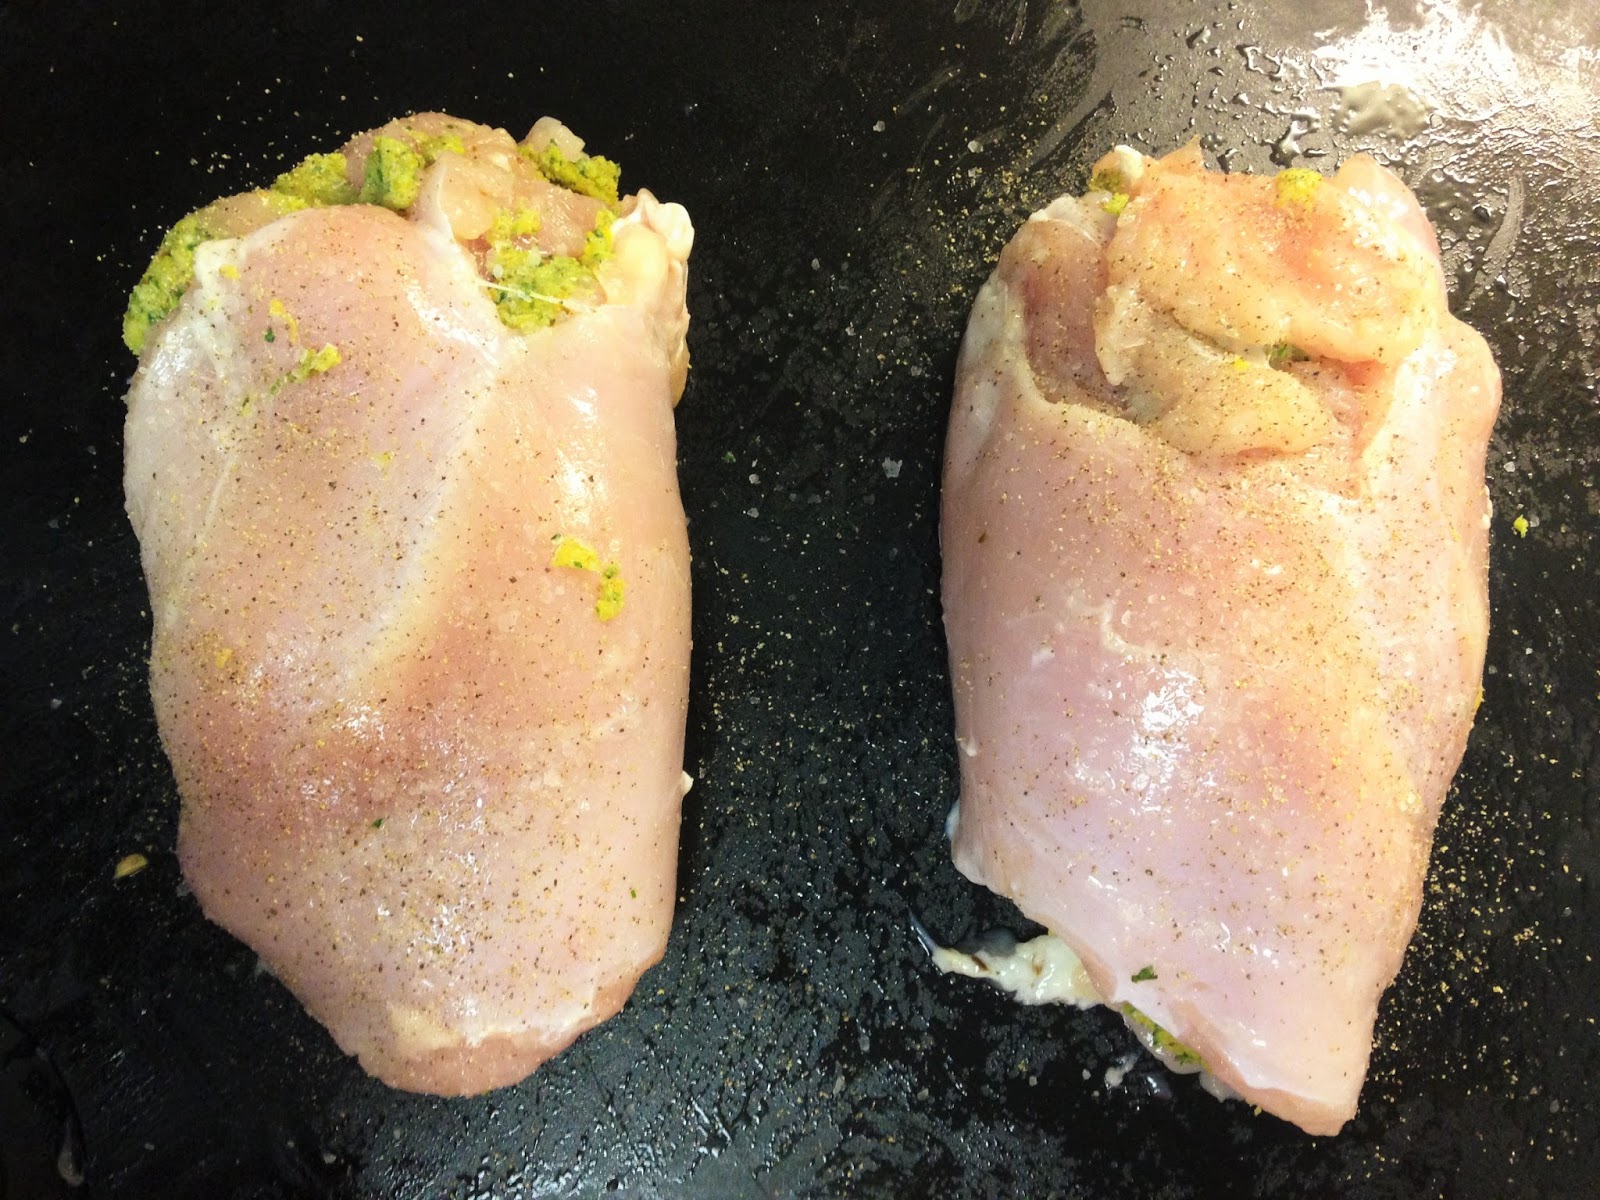
Season the breasts with salt and pepper. Top each of the breasts with half of the apricot almond stuffing mixture and spread it into an even layer.


Roll the turkey breasts into cylinders, tucking in any flaps of meat or bits of stuffing as you go. Season with salt and pepper.


Take the reserved turkey skin and cut it into two equal pieces. Lay a piece of skin over the top of each rolled breast and secure with kitchen twine. Transfer the breasts to a sheet pan fitted with a wire rack, then drizzle the breasts with extra virgin olive oil and rub into the skin.


Place the turkey breasts into the oven and roast for 15 minutes. This initial blast of heat helps the skin to brown and crisp. Drop the oven temperature to 350°F and continue to roast until a thermometer inserted into the center of the breast reads 165 degrees F, about 1 ½ hours.


Carefully transfer the breasts to a cutting board and allow to rest for about 10 minutes. Remove the string, slice and serve.


For the Brandied Turkey Gravy:

1 turkey breast carcass
2 small onions, roughly chopped
4 stalks of celery, roughly chopped
3 carrots, roughly chopped
2 tablespoons extra virgin olive oil
10 cups of water
3 stems of thyme
1 bay leaf
½ bunch of parsley

6 tablespoons butter
6 tablespoons all purpose flour
¼ cup brandy
Kosher salt and freshly ground black pepper

Preheat the oven to 400 degrees F.

Using a cleaver or large chefs knife, chop the turkey carcass into 2 to 3 inch pieces. Place the turkey pieces, onions, celery and carrots into a large sauce pan. Drizzle with the olive oil and stir to combine. Place the sauce pan into the oven and roast until the turkey pieces and vegetables are browned, about 60 to 90 minutes. Stir the turkey and vegetable pieces every 15 to 20 minutes as they roast.

Remove the saucepan from the oven and place on the stove top. Add the water, thyme, bay leaf and parsley. Heat over medium high heat until the mixture is boiling, then reduce the heat to a simmer. Simmer, stirring occasionally, for 2 to 2 ½ hours. 

Strain the turkey stock through a fine mesh sieve into a large measuring cup or bowl. Discard the turkey pieces and vegetables. You should end up with about 5 cups of stock. Measure out 3 cups of the stock for the gravy.

Add the butter to a saucepan and melt over medium heat. When the butter is melted, whisk in the butter to make the roux. Once the butter and flour are completely mixed together and bubbling, add the brandy and whisk to combine. Allow the mixture to cook for about 30 seconds to boil off the alcohol. Slowly pour in the 3 cups of turkey stock, whisking continuously. Continue to cook, stirring,until the gravy begins to bubble and thickens. Season to taste with Kosher salt and pepper.

For the Creamy Mashed Potatoes:

2 pounds Yukon Gold potatoes
4 tablespoons butter
1 cup heavy cream
Kosher salt and black pepper

Peel the potatoes and cut them into 2 inch chunks. Place the potatoes in a large saucepan and cover with cool water. Set the pan over medium high heat and bring to a boil. Cook until the potatoes are tender when pierced with a fork. (I actually prefer to use a cake tester, you can really feel the texture of the potatoes when you insert it. Any hint of grittiness indicates that the potatoes are not fully cooked.) Drain the potatoes into a colander, then using a potato ricer, rice them back into the hot saucepan. Using a potato ricer will insure lump-free, creamy potatoes.


Mix in the butter and cream and season to taste with Kosher salt and pepper. Serve immediately with the Brandied Turkey Gravy.

Friday, October 23, 2015

I ran out of jars...

I decided to take a couple of days off this week. I didn't have any grand plans for a trip, I just wanted to take a few days off when I could given that we're quickly heading into our busy time of year. Once we hit Thanksgiving, it's pretty much a vacation blackout until well after Valentine's Day. So, what did I do for the last four days? I cooked and canned apples.


If you remember from my last post, one of my favorite things to do in the fall is to go apple picking. The apples then become a big part of my holiday gift-giving as I transform them into apple butters, chutneys, you name it. My eyes were bigger than my canning kettle this time around, I estimate I ended up with at least 75 to 80 pounds of apples this year.

In the last four days, I figure I cooked off about 50 pounds of apples. One box is completely emptied, and the two remaining boxes are about half to two-thirds full. I still have more cooking and canning to do, but I ran out of jars.Guess what I'm doing on my day off next week...

I hope you enjoy this week's recipes. When making these for the purposes of my holiday canning project, I scaled the recipes up to 12 pounds of apples, so if you decide to make a batch yourself, you'll be able to use a standard sauce pan and not have to rely on a turkey roasting pan set over two burners as you'll see in the following photos. The chutney is a standard, I make this recipe almost every year, but the apple butter is a new creation. I'm pretty pleased with it!


Chardonnay Vanilla Bean Apple Butter
Makes 3 to 4 cups, or 3 to 4 half pint jars

After making two large batches of my regular spiced apple butter, I quickly realized that I needed to come up with another recipe to make use of all of the apples I had picked. (24 pounds of apples cooked, and I had barely made a dent in my boxes.) When I was digging through my spice cabinet, I found a packet of vanilla bean pods that I probably bought over 5 years ago. They were pretty dry, and as a result I knew they would be hard to split open and cook with, but they stuck in my mind.... Suddenly, I had it--play off the vanilla and apple notes found in chardonnay wine and turn it into apple butter. The dried out vanilla bean pods would work great as the apple butter needs to cook down for a fairly long time, giving the beans ample opportunity to soften and release their flavor. 

2 pounds apples, peeled and cored and chopped
½ cup chardonnay wine
1 cup granulated sugar
1 vanilla bean pod, split lengthwise and scraped with the back of a knife
juice of half a lemon

Combine all of the ingredients in a very large stainless steel saucepan.


Bring to a boil over medium-high heat, stirring occasionally. Reduce heat and boil gently for 30 to 40 minutes or until mixture is reduced and thickened. There should still be some tender apple chunks in the mixture. 


Remove the vanilla bean pods and discard. Using an immersion blender, puree the apple butter until it is smooth. 


At this point the apple butter can be cooled to room temperature and refrigerated where it will keep for about 2 weeks. Or you can place the apple butter into canning jars and process in a hot water canner. 

While the apples are cooking, prepare your jars for canning. Remove the lids and rings from the jars. Bring a large stock pot of water to a rapid boil. Sterilize the lids and rings by lowering them into the boiling water for about 3 minutes. Transfer them to a clean towel. Repeat with the jars.


Carefully ladle the hot apple butter into the hot jars, leaving about ½ inch of headspace. Cover the jar with a lid and a screw top ring. Tighten the ring to just finger tight.

When the stock pot of water has returned to a boil, lower the jars into the pot, standing them upright and in a single layer across the bottom of the pot. Make sure the jars are completely submerged under the water. Cover the pot and when the water in the pot returns to a boil, set a timer for 10 minutes. After 10 minutes, remove the jars from the pot and set on a clean towel. Repeat the process with the remaining jars, being sure to let the water come back to the boil each time.

Let the jars sit undisturbed until they are room temperature. You should hear a noticeable "plinking" sound as the jars cool and pull the center of the lids down. After they have cooled, gently press on the center of each of the lids to be sure they have fully depressed. Any jars with lids that have not pulled down tight have not properly sealed. Place those jars in the refrigerator and enjoy them first. 


Apple and Ginger Chutney
Makes about 6 cups, or 6 half pint jars

Part of setting up for a class is putting out a snack for the students. Yes they get to eat the food they make as part of the class, but eating the food usually comes at the end of the class, so we like to put out a little something at the beginning for them to nosh on. Our "throw down" snack, as I like to call it, is cream cheese and chutney--take a brick of cream cheese, put it on a plate, top it with chutney or some other savory jam, and serve it with crackers. Our students are amazed at how tasty it is, they don't believe us at first when we tell them it's just cream cheese. This chutney is also a tasty alternative to cranberry sauce at Thanksgiving, and it's really great with roasted pork.


large tart apples, such as Granny Smith, Honeycrisp, Fuji, peeled, cored, and chopped
1 medium red onion, finely chopped
1 ½ cups cider vinegar
1 ½ cups firmly packed brown sugar
1 cup golden raisins
1 tablespoon peeled and finely chopped fresh ginger
1 red bell pepper, seeded and finely chopped
2 jalapeno peppers, seeded and minced
1 cinnamon stick
4 teaspoons mustard seed
4 teaspoons coriander seed
2 teaspoons Kosher salt

In a large saucepan combine all of the ingredients.  


Bring the mixture to a boil, stirring, and cook it over moderate heat, stirring occasionally, for 40 minutes, or until it is reduced and thickened. 


At this point the chutney can be cooled to room temperature and refrigerated where it will keep for about 2 weeks. Or you can place the chutney into canning jars and process in a hot water canner. 

While the chutney is cooking, prepare your jars for canning. Remove the lids and rings from the jars. Bring a large stock pot of water to a rapid boil. Sterilize the lids and rings by lowering them into the boiling water for about 3 minutes. Transfer them to a clean towel. Repeat with the jars.


Carefully ladle the hot chutney into the hot jars, leaving about ½ inch of headspace. Cover the jar with a lid and a screw top ring. Tighten the ring to just finger tight.

When the stock pot of water has returned to a boil, lower the jars into the pot, standing them upright and in a single layer across the bottom of the pot. Make sure the jars are completely submerged under the water. Cover the pot and when the water in the pot returns to a boil, set a timer for 10 minutes. After 10 minutes, remove the jars from the pot and set on a clean towel. Repeat the process with the remaining jars, being sure to let the water come back to the boil each time.

Let the jars sit undisturbed until they are room temperature. You should hear a noticeable "plinking" sound as the jars cool and pull the center of the lids down. After they have cooled, gently press on the center of each of the lids to be sure they have fully depressed. Any jars with lids that have not pulled down tight have not properly sealed. Place those jars in the refrigerator and enjoy them first. 


Friday, October 16, 2015

My kitchen smells of cardamom....

I love autumn. I think it's my favorite season. I love sweater weather, the leaves turning every shade of yellow, orange, and red, the bright blue skies, soups and stews. Growing up in Houston, autumn was a little different--autumn meant that you didn't get sweaty the minute you walked outside, you didn't search for the one parking spot in the shade, and you could wear long sleeves and not get too hot. I know, not nearly as exciting sounding, and the only color the leaves turned was brown, but autumn was my favorite season even then.


One of the other great things about autumn in the northeastern United States are all of the pick-your-own apple orchards. I discovered apple picking shortly after I moved from Houston to DC. In Houston, I was familiar with red delicious, golden delicious, Granny Smith, gala, and Fuji apples were just starting to make their presence known in the grocery stores. But, that first day in the orchard, I discovered a whole new world of apple varieties--Stayman winesap, honeycrisp, Jonathan, Jonagold, macintosh (no, not just an Apple computer), mahon, pink lady, and more. As I started to get to know these new varieties, I found that some apples were great for eating right out of hand, others were mushy and best cooked into sauce, and some held their shape when cooked and were best for pies. That first autumn, I think I picked about 10 or 12 pounds of apples and used them to make a couple of pies and other desserts that I shared with my friends. Little did I know how that fun afternoon would eventually evolve into a new favorite, although seasonal, passion.

Over the years, I started to make apple picking not only an annual autumn ritual, I taught myself the basics of hot water bath canning and preserving. You see, that first haul of 10 or 12 pounds eventually grew into a half bushel box, then two, and then with my latest trip to the orchard, three half bushel boxes. A half bushel box usually weighs about 20 pounds, but my boxes are usually mounded pretty high when I get to the checkout stand. The folks at the orchard usually give me a little bit of a glare (I can imagine them muttering, "box stuffer") so I would guess my boxes probably weigh closer to 25 pounds each. Yes, that means I have upwards of 75 pounds of apples sitting on my dining room table. That's more than a couple of pies, learning how to can and preserve them is a necessity. 


I started out just making apple butter, and then expanded into apple chutney. In recent years, I added brandied apple rings and cinnamon apple wedges. The jars of preserved apples become a big part of my holiday gift giving. I send jars to friends, family, and my staff all get gift bags in December. 

Needless to say, working my way through 75 pounds of apples will take more than a couple of days. I've started the process, my first batch of apple butter was made with 12 pounds of apples, and it barely made a dent in the boxes. I've got some ideas for new recipes, so I'll probably have at least one or more two postings on the topic of apples in the coming weeks. In the meantime, I hope you enjoy my Spiced Apple Butter.


Angie’s Spiced Apple Butter
Makes 3 to 4 cups, or 3 to 4 half pint jars

2 pounds apples, peeled and cored and chopped
½ cup apple cider
½ cup granulated sugar
½ cup brown sugar
½ teaspoon ground cinnamon
½ teaspoon ground cardamom (my secret ingredient)
¼ teaspoon ground cloves
¼ teaspoon ground allspice
juice of half a lemon

Combine all of the ingredients in a very large stainless steel saucepan. (When I made my most recent batch, I scaled the recipe up to 12 pounds of apples. Instead of a saucepan, I used my stainless steel roasting pan and set it over two burners in order to cook that large amount of apples.)


Bring to a boil over medium-high heat, stirring occasionally. Reduce heat and boil gently for 30 to 40 minutes or until mixture is reduced and thickened. There should still be some tender apple chunks in the mixture. 


Using an immersion blender, puree the apple butter until it is smooth. 


At this point the apple butter can be cooled to room temperature and refrigerated where it will keep for about 2 weeks. Or you can place the apple butter into canning jars and process in a hot water canner. 

While the apples are cooking, prepare your jars for canning. Remove the lids and rings from the jars. Bring a large stock pot of water to a rapid boil. Sterilize the lids and rings by lowering them into the boiling water for about 3 minutes. Transfer them to a clean towel. Repeat with the jars.


Carefully ladle the hot apple butter into the hot jars, leaving about ½ inch of headspace. Cover the jar with a lid and a screw top ring. Tighten the ring to just finger tight.

When the stock pot of water has returned to a boil, lower the jars into the pot, standing them upright and in a single layer across the bottom of the pot. Make sure the jars are completely submerged under the water. Cover the pot and when the water in the pot returns to a boil, set a timer for 10 minutes. After 10 minutes, remove the jars from the pot and set on a clean towel. Repeat the process with the remaining jars, being sure to let the water come back to the boil each time.

Let the jars sit undisturbed until they are room temperature. You should hear a noticeable "plinking" sound as the jars cool and pull the center of the lids down. After they have cooled, gently press on the center of each of the lids to be sure they have fully depressed. Any jars with lids that have not pulled down tight have not properly sealed. Place those jars in the refrigerator and enjoy them first. 

Thursday, October 8, 2015

The grapes looked sad....

I hate my refrigerator.

When I bought my condo, the previous owner had done a kitchen remodel--new cabinets, new countertops, new flooring. Granted, the cabinets were probably from Home Depot, the countertops were formica, and the flooring was sheet vinyl, but they were new. The appliances, however, were the originals, circa 1990. Except the refrigerator, it was brand new. It's also very small. Not dorm-refrigerator-small, but not full-sized.

At the time, I chalked it up to the fact that the previous owner was an elderly woman who lived alone, and who was very petite, so to her it must have been the perfect size. Judging by how little the appliances had obviously been used, I guessed she didn't cook much. I also figured that she was trying to do as little to the apartment as necessary to sell it, so since the other appliances were still in good working order--and weren't replaced--that the original refrigerator must have broken down and would have been more expensive to repair than replace.

My refrigerator has the freezer on top. I know, not unusual, but think about it, do you spend more time getting into and out of your freezer or your refrigerator? Your refrigerator. Putting the freezer on top means that the compartment that is at eye level and easiest to access is the compartment that you use the least. On top of that, did I mention that it's small? I'm actually taller, by several inches, than my refrigerator. This means, that I have to bend over every time I get into the refrigerator, and if there's anything stored on the bottom shelf, I actually have to squat down or get on my knees in order to reach it. I regularly lose things that have been pushed to the back on the lower shelf. Out of sight, out of mind.

So, a couple of days ago, I was rearranging some items on that lower refrigerator shelf and realized that the grapes I had bought the week before had been pushed to the back. The grapes were a little sad looking, not spoiled, but not as plump and fresh as they had been. I didn't want to throw them away, that would be wasteful, but what to do....

I suddenly remembered a dish I had eaten years ago. I don't remember the name of the restaurant, or even what city I was in, but the dish was pasta with a spicy sausage and grapes! I remember that the sweetness of the grapes were the perfect counterpoint to the heat of the sausage. Using that faint memory as inspiration, I decided to create my own version of the dish and give life back to those sad, forgotten grapes. I'm pretty pleased with the results....


Rigatoni with Spicy Sausage and Grapes

When I was working on this recipe, I used ingredients that I had on hand. Feel free to try other pasta shapes (I think penne or orecchiette would make nice options). I happened to have fresh chorizo in the refrigerator, but this dish would also work great with a spicy Italian sausage.

Serves 4

2 tablespoons extra virgin olive oil
1 pound fresh spicy sausage, such as chorizo or Italian, removed from the casings
1 leek, cleaned and thinly sliced (it looked lonely in the refrigerator, so I added it to the dish)
1 small onion, diced
1 cup white wine 
1 ½ cups chopped fresh tomatoes
½ teaspoon red pepper flakes, optional
1 cups red or green seedless grapes, stems removed
2 tablespoons chopped Italian flat leaf parsley
1 pound rigatoni, cooked per the package instructions
Kosher salt and black pepper to taste
Grated parmesan cheese to garnish

Heat the oil in a large skillet over medium heat. When warm, add the sausage to the skillet and cook, stirring and breaking up the sausage as it cooks. When the sausage is no longer pink, add the leek and onion and a pinch of salt. Continue to cook, stirring, until the onions are softened and translucent, about 5 minutes. Add the wine and stir, scraping any browned bits off the bottom of the skillet. Bring the wine to a simmer and cook until the liquid has reduced by at least half, about 5 minutes. Stir in the tomatoes and red pepper flakes and continue to cook, stirring occasionally, until the tomatoes have broken down, another 5 minutes more. Add the grapes and cook until the grapes are plump and softened, about 3 to 5 minutes. Stir in the parsley, taste and season with additional salt and pepper. 

Drain the rigatoni and add to the skillet with the sausage and grapes. Stir to evenly mix, then divide into 4 warmed pasta bowls. Garnish with parmesan and serve.


P.S.: I think I finally figured out why the the previous owner both replaced the refrigerator and did so with one so small. About a year or two ago, I considered replacing it with something larger, and when I measured the space, I discovered that distance between the floor and the bottom of the cabinets above the refrigerator was about an inch to short to fit a standard sized refrigerator. My guess is that the contractor didn't check that measurement when ordering the cabinets and only realized after the fact that the original refrigerator was too tall to fit in the new opening. Getting a new, larger refrigerator will require removing the cabinets above. So, for the time being, I'm living with it as it is. Maybe someday, I'll get the chance to do the kitchen over properly--and you can be sure I'm going to double check all the measurements!